Publishing and sharing content (Scoop.it)
Now that you've set up your first topic, you're ready to curate and publish content to educate and engage your audience. Scoop.it makes this process very easy and this article will give you details on the various steps:
- Choose content to publish
- Choose where you want to publish it
- Edit your post and click publish
1. Choose content to publish
There are four different ways to publish content to your topics. You can scoop:
- from your suggestions,
- from any web page you're browsing through the Scoop.it bookmarklet,
- by copying and pasting the URL of any page,
- by rescooping content from your fellow curators.
We'll start by covering how to publish content from your Scoop.it suggestions and then cover how you can publish through these other methods.
Using the suggestion engine to post
The suggestions are the content that we've found from around the web based upon the keywords that you provided for us that we think might be interesting to you. If you haven't configured your suggestion engine, here's where you'll find instructions to do so.
To access this content, visit your topic page, then click on Suggestions in the top righthand corner.

Once suggestions show up, simply scan for the ones you like and click the Scoop.it button.
When you scoop a piece of content, the publishing window appears.

Scoop.it automatically prepares your post by gathering the title, image, and an excerpt from the original content. You will now be able to choose where to publish your curated and also to enrich it with your insight by editing it.
2. Choose where you want to publish and share it
Scoop.it lets you publish your curated content to:
- your own Scoop.it topic page, a webpage hosted on Scoop.it or on your domain, and where your content can be discovered through search engines and shared to social networks or forums;
- your blog or website through one of our integrations;
- your social networks.
Publishing to your own Scoop.it pages:
By default, Scoop.it will publish your curated content as a new scoop on your topic page and, if you select sharing options, will share the link of this scoop on your selected social channels. This set up enables you efficiently maintain your online presence by (1) feeding your social channels with engaging content while (2) updating your own webpage on that topic with that same curated content - which can now also be discovered through search engines and re-shared with attribution by your visitors. Your curated content - and therefore you - will have growing visibility not just from your social networks but also Google Search and the Scoop.it community of users.
Over time, you can use several topic to better organize your content. The drop down menu at the top lets you select which one your publishing to:

To select which social networks to distribute your curated content on, simply click the social accounts of your choice:

Scoop.it will create as many social posts as you've selected when you hit publish. Note: if you haven't configured any social connexions when you created your account or if you want to add more, simply click the "Add more" button or read these instructions.
Publishing directly to social networks while bypassing the Scoop.it page by using Direct Link:
If you don't want to use any Scoop.it page or if you simply wants to share an occasional post directly to your social channels without directing your social networks to your Scoop.it page, you can do so by using the Direct Link feature:

What does the Direct Link feature do?
When Direct Link is "On", Scoop.it will share your curated content to the social networks you have selected but the link that will be included in those social posts will not direct to your Scoop.it topic page. Instead, it will redirect your social followers directly to the original source of content.
When should I use Direct Link?
Though posting your content on your Scoop.it page greatly improves its visibility as you can get search traffic, additional shares or be discovered through the Scoop.it site, it brings an additional step for your followers to discover the original content: their first click will get them to land on your Scoop.it topic page where they can read your insight (see section 3) and discover related content you previously curated; their second click will bring them to the original content. So it all depends on the added value you bring your audience by bringing them to your Scoop.it page: if you did,'t have time to add an insight to elaborate on the curated piece or if you don't have related content that might be also interesting, use DirectLink. If you add something to add to your scoop and have great additional related content to show for on your Scoop.it page, then leave it turned off.
Note: Scoop.it will remember from your last scoop which option you chose.
Publishing to your own website or blog:
You can use your own CMS instead through one of our integrations to publish your curated content directly to your website or blog. By doing so, your Scoop.it topic page will not be used as the destination for your social media shares. Instead, your social media followers will be directed to your blog or website as you publish and share content to your website or blog through Scoop.it. This allows you to build your audience on your website or blog while spending much less time than writing original content.
Summary of the various publishing options:
The following table summarizes the various options you have when publishing content through Scoop.it:
| I want to publish curated content to... | Configuration needed | How do I do that? |
| My own Scoop.it topic page only. | Default | Simply click publish. |
| My social networks and drive corresponding clicks to my own Scoop.it page. | Default but you can add more social accounts in your settings. | Select sharing options and click publish. |
| My social networks and drive corresponding clicks to the original source. | Direct Link | Turn Direct Link to "on" in the sharing options. |
| My blog or website and my social networks while driving corresponding clicks to my blog or website. | SEO / Website integration | Once the integration is set-up, simply select sharing options and click publish. |
3. Edit your post and click publish
Good content curation provides value to your audience through additional context or commentary. The Scoop.it publishing window lets you do that easily and with great flexibility.
Edit your post title, image and quote:
By clicking on the pen icons on your post title and image, you can easily edit them. You can give a different angle to your curated content with a new title or can illustrate it with a new visual.
Don't like the quote Scoop.it chose for you? You can also click in the quote section to edit it the way you want.
Add value by providing an insight to your audience:
The insight field lets you add your own commentary to the curated piece. This insight will then be added to your post on your Scoop.it topic page or as the body of your blog post if you're using one of our blog / website integrations.
To get started, add a commentary in the insight section:

Once you're down, click on the social media status fields and your insight will be automatically copied there. If you want to further customize your social media messages for each of your channel, simply click on the corresponding field and do some further editing.
Once you're done, simply click publish.
4. Other methods for publishing content: scooping content from web pages or rescooping fellow curators
Using the bookmarklet to post on the fly
If you're browsing the web and find an article you'd like to scoop, just click the bookmarklet and the publishing window will appear without even leaving the page you're on.

To install the bookmarklet, click here. Make sure your bookmarks bar is visible and just drag it up! If you're having trouble installing this, read this.
Pro Tip: the bookmarklet allows you to choose which excerpt you want to add to your scoop by highlighting the text within the original page before clicking on the Scoop.it! button.

Posting via a URL
If you have a URL that you'd like to scoop to one of your topics but aren't on that page, you can simply click on the New Scoop window on top of your topic page, then enter the URL and Scoop.it will gather the rest of the information (that you can also edit afterwards).

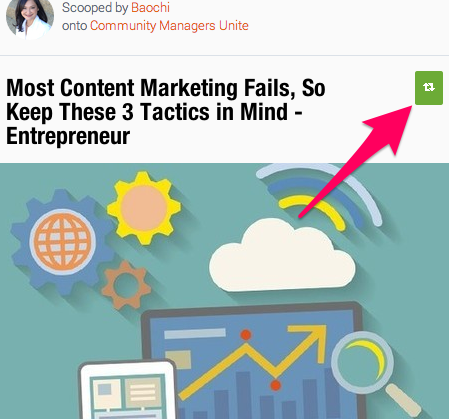
Rescooping from fellow curators
If you see a scoop on another topic that you particularly like, just click on the green Rescoop button to publish it to your topic. You can add additional insight to rescoops as well.
5. Scheduling a post in advance
Scoop.it Pro and Scoop.it Business customers can set a date of publication for their content on a post per post basis directly from the Scoop.it publishing window.

This feature enables you to edit an article, set a date and an hour in advance to post your content with a perfect timing.
6. Using and managing tags to organize your curated content on your Scoop.it topic page
If you're using your Scoop.it topic page as the destination for your curated content, you might want to use tags to better organize your content. Tagging your posts will help your audience browse your topic and easily find what they’re looking for. For this reason tagging is one of the indicators that defines your score.
Advanced Options in the New Scoop window
You can tag a scoop directly as you publish it from the Scoop.it suggested content, the Scoop.it bookmarklet or the New Scoop button. From the Scoop.it publishing window, click on Advanced Options at the bottom in order to directly tag your article. You can add (several) tag(s) to each post in your topic(s). Click on Publish when you're done.
Use the tag button
To tag a previously published scoop, simply mouse over it to make the toolbar appear at its bottom. Then click on the tag button, add the tag and then click on Save.
Filtering by tags
You and your visitors can filter a topic based on tags thanks to the Filter icon in the top right of the topic menu bar. This will display only content pertaining to a selected tag. You can also use this feature to filter a topic on a keyword which wasn't part of the selected tags for this topic. Scoop.it will then display the topic, filtered on this keyword.
Note: you can delete a tag by clicking the cross at the right side of the tag.
7. Editing / deleting a scoop on your topic page after it's published
You can always edit, modify or delete content from a scoop once it's published by going to your topic or your scoop permalink.

Mouse over the scoop you want to edit so the menu bar appears:

Use the trash icon (to delete) or the pen icon (to edit).